Are you concerned about eating too many carbohydrates? If so, you should probably just skip this one. But if you're concerned about soggy limp oven fries, read on! There are three secrets to making crispy oven fries that every carb-lover should know. And of course, some steps that aren't too secret. First not-so-secret-step? Scrub your potatoes really well. Dirty potatoes are gross.
First secret: soak your wedges in salt water. The salt pulls out some of the moisture from the potatoes. Trust me, don't try to hurry this along, and don't skip that step. I soak them about an hour. This definitely isn't a side dish that you can throw together at the last minute.
Second secret: dry the wedges. Like, with a towel. You want to get as much moisture off the fries as possible. Why? Because if you don't, you end up steaming your potatoes. That's why they're a soggy mess. You don't want to serve your family a soggy mess. So dry your potato wedges really well with a towel.
Not so secret? These need a bit of oil and salt. I use either olive oil or canola oil, and our family likes season salt. I dry out the bowl I used to soak the wedges, put the dry-ish wedges back into the bowl, pour in a bit of oil and salt somewhat liberally. Sorry to sound like 'a pinch of this' and 'until it looks right' but generally I just drizzle and shake. I'd estimate I use about a quarter cup of oil and perhaps 2-3 teaspoons of season salt.
Use two spoons and toss the
potatoes over and over until there is oil and salt on all of them. They
don't need a lot of oil--not at all. Just a bit. If you wanted greasy fries, you'd go to a drive thru. (Though, ok, greasy fries are sometimes good and they're certainly faster than making them on your own.)
Last secret: don't let your potatoes overlap when you put them on the pan. I use two pans, and I line each pan with nonstick foil. It might take a few minutes to arrange the wedges, but it's worth it. You want all the sides of each wedge to get crispy, not stuck together. When they're too crowded, they tend to steam instead of get crispy. You don't want soggy oven fries. You don't.
Throw these babies into a hot oven. After about 20 minutes, flip them all over and let them cook until they are good and browned--another 15 to 20 minutes.
YUM-MA. Crispy, and a little salty, and not soggy at all. Perfect with ketchup, perfect with grilled burgers. Go for the carbs, friends. Seriously. This stuff is mood food. For real! If you don't believe me, refer to this MIT study. You'll be happy after you eat them. Your family will be happy. They will praise you and thank you.
Or at least they'll clean their plates. Potatoes ARE a vegetable, right?
Oven Fries
Serves about 6 who love oven fries
10 potatoes, scrubbed
1/4 cup (or so) olive or canola oil
2-3 tsp (or so) season salt
Scrub your potatoes well and cut them into wedges. I generally cut my potato in half length-wise, and then cut each half into 4-6 wedges. Fill a large bowl or pot with salted water, and soak the potatoes for about an hour. Turn your oven to 450 degrees. Drain the potatoes, and place on a towel. Dry the large bowl or pot, and dry the potatoes as much as you can with the towel. Put the wedges back into the bowl and toss with oil and salt. Line two baking pans with foil, and arrange the wedges evenly onto the pan so the wedges do not overlap. Bake for about 20 minutes, then flip all of the wedges over. Bake another 15-20 minutes, or until the fries are browned and crispy. Remove from the oven, and allow to cool enough so you don't burn your fingers. Enjoy!
Snippets from a working mama with a spatula in one hand, a tablet in the other, as she balances career, motherhood, and life on a little Iowa farm.
Wednesday, May 15, 2013
Saturday, May 11, 2013
Mustard-Roasted Pork Loin
I made a very serious shopping error last week. I bought something without asking how much it cost, because I assumed I knew. I've had a great recipe for beef tenderloin torn out of a magazine for months, and in doing my bi-weekly menu planning I thought we'd give that one a try. My family really digs pork loin, so it goes to say they'd like beef tenderloin too.
That word "tender" is ridiculously expensive, I guess.
I wanted 3-4 lbs of beef tenderloin, and the butcher at our local grocery had to go back into the refrigerator unit to grab it. No different than he does with the pork. He said he couldn't do 3-4 lbs, he'd have to sell me 8 because if they open a package of it, they have to sell the whole thing at once or they've found the other half doesn't get sold in time and they have to throw that out.
That should have raised an alarm.
But no.
I just told him I'd buy it all. No biggie. Our family would eat it. Looking back, I see now that probably sounded pretty cavalier. Because that 8 lb package cost me $90. Yes $90. Ninety. Dollars. I didn't look at the price on it until I'd turned away from the counter.
You know that feeling when the blood drains from your face and your nose tingles? I was there. It couldn't be returned, because he'd broken open the package that preserves it. It was mine. All mine. Dear God. I hyperventilated through the rest of my grocery shopping and quickly left the store.
That beef tenderloin is going to sit in my freezer until August, when I have a significant birthday. I don't even know if I like beef tenderloin--I don't even really like meat--but seriously you don't eat $90 of meat on any ol' Tuesday. So yeah. Instead of making that recipe, I substituted pork loin in place of the beef tenderloin, and it was brilliant if I do say so myself.
Meat is disgusting, isn't it? It really is. I salt and peppered all sides of this, rotating it with tongs because I really don't like touching raw stuff. Then I whipped together butter with stone ground mustard and dijon mustard. You'd think my kids would turn up their noses at this, but they loved it. Weird.
It sort of looks like I frosted a cake, right?
It really smelled lovely cooking--savory and tangy. I let it rest for 15 minutes and whipped up this mustard sauce.
Mustard sauce sounds gross. But it isn't. You know what else isn't gross? This.
This stuff tasted like $90, without the whole tingly nose issue. It's definitely a make again. I can't vouch for what it would be like with beef tenderloin. Give me a couple months for that. Though I'll admit, I'm far more excited about the cake!
Mustard-Roasted Pork Loin
Adapted from Mustard-Roasted Beef Tenderloin by Martha Stewart
3-4 lbs pork loin
2 T stone ground mustard
1 T dijon mustard
4-5 T butter, room temperature
salt and pepper
Preheat oven to 425. Season the raw pork on all sides, then place it on a parchment paper-covered pan. In a small bowl, whip together the butter, djon and stone ground mustard. Cover the three exposed sides of the meat with the mixture. Cook for about 45 minutes, or until a meat thermometer reads between 145 and 160 degrees. Remove from the oven and allow to rest 10-15 minutes. Slice and serve with mustard sauce, if you're into that.
Mustard Sauce
1/2 c. heavy cream
2 T stone ground mustard
1 T dijon mustard
Using beaters or a food processor, whip together all three ingredients until soft peaks form. Serve with sliced pork loin.
Thursday, May 9, 2013
Cilantro Lime Dressing
Embarrassing confession. I like McDonald's grilled southwest chicken salad. No Southwest dressing. Extra tortilla strips. A lot. (blush) Without the Southwest dressing it's about 300 calories, and it's got lean chicken in a cilantro lime glaze, black beans, corn and greens. About as healthy as you could get at McDonald's. Except for the tortilla strips, of course.
Since Sunday was Cinco de Mayo, and since our daughter is Hispanic (and Native American), I was inspired to make a 'fresh-Mex' meal. I wanted to recreate the cilantro lime glaze from the McDonald's salad and use it as a marinade for grilled chicken. (Yep, totally embarrassed that I tried to recreate something from McDonald's, but there ya go.) I found this recipe over at Allrecipes, and though it didn't do well as a marinade (not strong enough) it was AWESOME drizzled over the grilled chicken when it was cut up in a salad. And so pretty in a mason jar, too. It's all about how good things look in a mason jar, isn't it?
The recipe I followed called for a whole jalapeno but I used only half of one. (Because we're total lightweights from Iowa, remember?) The dressing wasn't a bit spicy, but the jalepeno kept it from being too sweet.
Our kids think juicing citrus fruit is fun. We're easily entertained.
I say 'we' because using my immersion blender is super fun. I'm excited every time I make something that requires it. Sad, but true.
Almost time to plant some of this outside, but for now we settle for store-bought cilantro. So pretty and fresh! Doesn't it all just look healthy and scrumptious? The oil and honey in it isn't very healthy, but it LOOKS healthy. It doesn't taste a lot like the cilantro lime dressing that is on the grilled chicken in McDonald's southwest salad but I guess fine cuisine like that should be saved for the drive through.
Cilantro Lime Dressing
Recipe slightly adapted from Allrecipes
1/2 to 1 jalapeno
1 clove garlic
1/4 tsp powdered ginger
1/4 cup lime juice (about 1.5 limes)
1/3 cup honey
2 tsp balsamic vinegar
1/2 tsp salt
1/4 packed cilantro leaves
1/2 cup olive oil
Remove the seeds from the jalapeno and chop into large pieces. In a blender, or the cylinder that comes with your immersion blender, combine the jalapeno with the garlic, ginger, lime juice, honey, vinegar and salt. Blend well. Add cilantro leaves and blend again until the leaves are well incorporated. Drizzle in the olive oil, then blend one last time. If the dressing sits for any length of time the oil will separate from the other ingredients. Shake vigorously to reincorporate it. Enjoy!
Monday, May 6, 2013
Egg Bake
I have a problem. Not with egg bake. Egg bake is good. It is easy. Your family will like it.
This is my problem.
And I can definitely answer the question of which came first. It was the chicken. Chickens. Of which, we seem to be accumulating strange and diverse species of.
This spring we got three different batches.
And we still have the ones from last year.
And the year before. Help me.
One weekend I found chicks in my bathtub. And we're still married.
I blame it on this boy, who wants to show chickens for 4-H. Who can resist his brown eyes? His dad can't, that's who. His dad keeps caving in. That's why we have more than 16 dozen eggs in our refrigerator.
What's a girl to do? She makes egg bake. And angel food cake. And meringue. She sells them. She gives away eggs to elderly neighbors, and folks dropping by to pick up their children. She sends them with family members. And she shares her recipes with you. If you want to make egg bake, feel free to come on over and take a dozen to get you started.
You might double this recipe, though, because it only calls for six. And some milk.
Salt. Peppers. Ground mustard. Weird, right? Ground mustard.
Whisk it all up but good.
Add croutons. You could use old bread, but croutons seem less....old? I don't know. The thought of baking with stale bread just kind of grosses me out. (Do not tell me croutons are old bread. K? They come from a store, so they have to be approved by the FDA, and the FDA would never approve old bread. Don't remind me of "pink slime".)
You can make this meatless, or you can use crumbled bacon, ham or sausage. Whatever floats your boat.
Cheese too, of course.
It all goes into a pan or casserole dish. That depends on how long you have to cook it, and how big you want the pieces. If you put it in a 9 x 13 pan, everyone will get big square pieces and it will cook faster. If you put it into a round casserole or 8 x 8 dish, everyone will get deep thick smaller pieces, and it takes longer to bake all the way through.
About 45 minutes in my deep round casserole, and it's ready to go.
All the cheese and egg and bread and sausage meld into perfect brunch food. Or breakfast-for-supper, if you have an appetite like my children.
They find it particularly good with applesauce--one of the few types of 'fruit' they will eat. If you have eggs in excess, or just feel like breakfast-for-supper now too, give it a try. It's good.
Egg Bake
A Hoey family recipe that appears regularly for holiday brunches.
6 eggs
2 c. milk
1 tsp salt
1 tsp ground mustard
1/4 tsp pepper
1 5 oz package croutons
1 c. shredded cheddar cheese
1 lb. cooked ground sausage, or meat of your choice
Preheat oven to 400. In a bowl, combine eggs, milk and spices. Whisk until well blended. Stir in croutons, cheese and meat. Pour into a greased baking dish. The baking time will vary depending on the size of dish you use. An 8 x 8 baking dish will take between 35 and 45 minutes. A 9 x 13 baking dish will take a shorter amount of time. Bake until the eggs are set. Remove from the oven and allow to cool for 3-5 minutes. Enjoy!
Sunday, May 5, 2013
Breadsticks
Two years ago, my husband and my mom surprised me--for no specific reason--with a KitchenAid mixer. It's probably sad how much I love it. If my house was burning down, it would be one of the first items I'd want to save after the children, the pictures, my laptop and the treadmill. Priorities, right?
Our fresh bread consumption increased noticeably with the mixer. It does the kneading, which means no floury mess all over the counters. I also know everything that goes into our food--no preservatives, dyes or anything unpronounceable. Plus, it makes my family happy.
I make breadsticks with the same basic recipe I use to make French bread. They're chewy and light, and go perfectly with pasta, soup and anything off the grill. Aside from the rise time, they're quick to throw together and they taste like you slaved all day. You'll like them. Try them! Try them, and you may I say! (Green eggs and ham, anyone?)
Yeast is cool, isn't it? Let the yeast do its thing with warm water and it will get creamy and foamy. It will change your bread dough from this
to this in an hour.
That's my mixer bowl on top of that glass dish. I used to lay a damp cloth over it, but inevitably the dough would rise and stick to the cloth. I'm not cool with that. The mixer bowl gives it plenty of room to expand without making a messy.
Much of my life is driven by mess avoidance.
At this point you could just make French bread, but if you want breadsticks you should tear off hunks to roll like Play-Doh worms. Bigger than a golf ball, smaller than a baseball. About this much:
It will probably take a little flour when you roll these so they don't stick to your hands and the counter. I line my baking pans with nonstick foil, and they come off perfectly. Nonstick baking foil and paper towels. My guilty kitchen addictions that are bad for the environment.
If you want the breadsticks to have a more crispy-chewy texture, brush them with olive oil. I like to add garlic powder to the oil before brushing. If you prefer your breadsticks to have a more soft-chewy texture, brush them with egg white. The egg white will make the breadsticks shiny and more golden, if you care about that. Then let them rise another half hour. While they rise, take note of your environment. Shoosh away any chickens who have wandered too close to the house. Shame your farm cats for allowing a bird to eat their cat food.
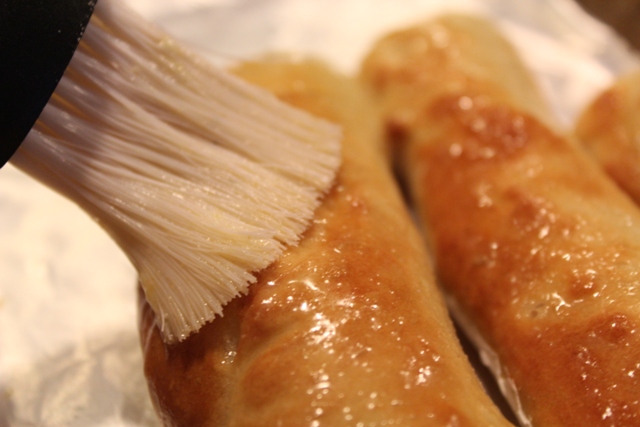
After you've done your animal control, or laundry, or whatever, and a half hour has passed, bake the breadsticks for 15-16 minutes. Magic happens. Then brush them with butter (and more garlic powder if you want) and more magic happens.
Serve them in a pretty dish, or just let your family snatch them, piping hot, off the pan. Either way, it's all good.
Breadsticks
Servings: 12-14 breadsticks
Adapted from this French bread recipe.
1 packet of yeast (or 2.25 tsps)
1/4 c very warm water
1 c water
3 c bread flour
1.5 tsp salt
1.5 tsp sugar
2.5 T olive oil
In a measuring cup or small bowl whisk the yeast with the very warm water then let it rest 5-10 minutes. In your mixer bowl, combine the bread flour, salt and sugar. Mix to combine. Add the yeast mixture, water and olive oil. Mix until dough is formed. Either switch to a dough hook and have your mixer knead the dough for 8 minutes, or take it out of the bowl and knead it yourself. Place the dough in a greased bowl, set the bowl in a warm and draft-free area, and allow the dough to rise about an hour. The dough should double in size.
Preheat the oven to 400. Line a baking pan (or two) with nonstick foil. Flour your hands a bit, then tear off a piece of dough--bigger than a golf ball, smaller than a baseball--and roll it out until it's about six inches long. Brush with either olive oil or egg white, then allow the breadsticks to rise a half hour. Bake for 15-16 minutes, or until done. Immediately brush with butter, or garlic butter if you'd prefer. Enjoy!
Our fresh bread consumption increased noticeably with the mixer. It does the kneading, which means no floury mess all over the counters. I also know everything that goes into our food--no preservatives, dyes or anything unpronounceable. Plus, it makes my family happy.
I make breadsticks with the same basic recipe I use to make French bread. They're chewy and light, and go perfectly with pasta, soup and anything off the grill. Aside from the rise time, they're quick to throw together and they taste like you slaved all day. You'll like them. Try them! Try them, and you may I say! (Green eggs and ham, anyone?)
Yeast is cool, isn't it? Let the yeast do its thing with warm water and it will get creamy and foamy. It will change your bread dough from this
to this in an hour.
That's my mixer bowl on top of that glass dish. I used to lay a damp cloth over it, but inevitably the dough would rise and stick to the cloth. I'm not cool with that. The mixer bowl gives it plenty of room to expand without making a messy.
Much of my life is driven by mess avoidance.
At this point you could just make French bread, but if you want breadsticks you should tear off hunks to roll like Play-Doh worms. Bigger than a golf ball, smaller than a baseball. About this much:
It will probably take a little flour when you roll these so they don't stick to your hands and the counter. I line my baking pans with nonstick foil, and they come off perfectly. Nonstick baking foil and paper towels. My guilty kitchen addictions that are bad for the environment.
If you want the breadsticks to have a more crispy-chewy texture, brush them with olive oil. I like to add garlic powder to the oil before brushing. If you prefer your breadsticks to have a more soft-chewy texture, brush them with egg white. The egg white will make the breadsticks shiny and more golden, if you care about that. Then let them rise another half hour. While they rise, take note of your environment. Shoosh away any chickens who have wandered too close to the house. Shame your farm cats for allowing a bird to eat their cat food.
After you've done your animal control, or laundry, or whatever, and a half hour has passed, bake the breadsticks for 15-16 minutes. Magic happens. Then brush them with butter (and more garlic powder if you want) and more magic happens.
Serve them in a pretty dish, or just let your family snatch them, piping hot, off the pan. Either way, it's all good.
Breadsticks
Servings: 12-14 breadsticks
Adapted from this French bread recipe.
1 packet of yeast (or 2.25 tsps)
1/4 c very warm water
1 c water
3 c bread flour
1.5 tsp salt
1.5 tsp sugar
2.5 T olive oil
In a measuring cup or small bowl whisk the yeast with the very warm water then let it rest 5-10 minutes. In your mixer bowl, combine the bread flour, salt and sugar. Mix to combine. Add the yeast mixture, water and olive oil. Mix until dough is formed. Either switch to a dough hook and have your mixer knead the dough for 8 minutes, or take it out of the bowl and knead it yourself. Place the dough in a greased bowl, set the bowl in a warm and draft-free area, and allow the dough to rise about an hour. The dough should double in size.
Preheat the oven to 400. Line a baking pan (or two) with nonstick foil. Flour your hands a bit, then tear off a piece of dough--bigger than a golf ball, smaller than a baseball--and roll it out until it's about six inches long. Brush with either olive oil or egg white, then allow the breadsticks to rise a half hour. Bake for 15-16 minutes, or until done. Immediately brush with butter, or garlic butter if you'd prefer. Enjoy!
Subscribe to:
Posts (Atom)