Saturday, October 26, 2013

Pumpkin Cinnamon Rolls


I figure I have between now and November 30th to use up the ridiculous amount of pumpkin I've got.  Pumpkin is for fall, and December 1st marks the definite shift to "Christmas season."  Pumpkins aren't for Christmas.  

This season we've had everything from pumpkin scones to pumpkin bars to pumpkin cookies.  I've even made my own pumpkin pie seasoning.  This recipe for pumpkin cinnamon rolls found its way into my Pinterest feed, where it was promptly pinned and made.  

Yu-um.  They were so scrumptious I made more of the dough, but froze it after I cut it into slices.  On Thanksgiving morning when we have lots of family here, I'll put them in my biggest rectangular baking pan, let them rise that last time, bake them, and slather them with frosting.  Way faster than starting them from scratch  I'm smart that way.  

Especially because starting them from scratch, for me, meant grabbing a pumpkin off of my front porch.  Instead of the baking method, I scooped out the seeds and cut the pumpkin into wedges where I boiled it until it was soft.


When I say from scratch, I really mean it!  The pumpkin gets mixed with a yeast-water mixture, scalded milk, egg, sugar and some butter.


Expected dry ingredients - flour, salt and spices - are mixed in and the dough is kneaded for about five minutes by the fabulous KitchenAid.

Long story made short: it rises, gets punched down, then rolled out to about a 15 x 10 rectangle.  A lot of butter is poured all over it.  


Then a lot of sugar, brown sugar, cinnamon and pumpkin pie spice is sprinkled over the top.


You know these naughty ingredients are why the cinnamon rolls taste so good.


Here's a tip for you.  You could cut the roll into pieces with a knife, but it will squish down the rolls.  Instead, grab up some dental floss.  Then do this.


Fun, right?  My kids are forever finding interesting uses for dental floss.  I impressed them with this one.


(FYI, I put the second batch into the freezer at this point).  

If you're baking them, not freezing them, let them rise a second time, give them a turn in the oven, and this happens.


Right?  Cinnamon rolls.  Pumpkin cinnamon rolls.  I pretended I was a school lunch lady and served them with chili at supper time.  They made terrific breakfast food before school the next morning.


Since I didn't alter the recipe I used for the rolls or the frosting, I'm going to share the links to them below.  I would have used the maple cream cheese frosting the pumpkin cinnamon roll recipe called for, but we have a cream-cheese-hater here.  The brown sugar frosting was super, though, and I'd recommend it!

Pumpkin Cinnamon Rolls
Brown Sugar Icing

Sunday, October 20, 2013

Halloween Cheesecake


Of all of the holidays, Halloween has to be my least favorite.  I just can't get into skulls, gore, monsters and spiders.  Honestly I might even prefer President's Day and Columbus Day.  Serious.  Maybe I'm a fun-hater.

That being said, I recently saw really cute spider cookies on Pinterest.  (Um, I just used 'cute' and 'spider' in the same sentence.  Yikes.)  Eli loved them and campaigned to make them, but I don't have any meringue powder to make royal icing.  Izaak, on the other hand, has been requesting cheesecake.  And then I had an epiphany.  A Halloween cheesecake.  

I can't bring myself to call this creation a spider cheesecake, or a spiderweb cheesecake, because how unappetizing does that sound?

Unappetizing.

People who like spiders and spiderwebs should come over and visit my barn in August to see the real deal.  We're authentic around these parts. 

So this is a Halloween cheesecake.  I started with the Ultimate Cheesecake Recipe from Tyler Florence of the Food Network.  Heads up - it called for 45 minutes of bake time, but could have used 50.  The bad thing about cheesecake is that it's hard to tell when it's done just by looking at the top.  But no cracks on the top, and that's always a good thing! 

   
After the cheesecake chilled overnight I made a ganache, of sorts.  I couldn't melt the semi-sweet chocolate chips with heavy whipping cream because I didn't have any so I went with something better anyway.  Peanut butter.


For the spiderweb I went with melted almond bark because I had a few bricks left from a different project.  I'm sure melted white chocolate chips would have been fine, too.


I love those squeeze bottles.  You can get them at WalMart for like $2, and they're fabulous for projects like this.  Use the squeeze bottle to draw circles on the top of the chocolate.  If you don't have a squeeze bottle, just put the melted almond bark in a zip-loc baggie, cut a tiny bit of one corner off and squeeze it out of that.


Then you'll need another specialized tool.  A toothpick.  Starting at the center, just drag a toothpick to the outside all around the cheesecake and walla, a web!


Since it's a spiderweb, it seemed a little empty without an occupant....

 
He's made out of a Hershey's Spice Kiss and some black licorice.  Since he's so very obviously not life-like, he's not disgusting and doesn't ruin the cheesecake.  Why anyone makes life-like bugs and eyeballs and chopped off fingers out of food is really beyond me.  I just don't get it.

But this, I get.

 
Let me tell you, I reached rock-star-mom status with this thing.  Our 15-year old took a picture with his iPhone.  To show his friends.  For real.  (Disclaimer: This is the same boy who hates cream cheese and can detect it in anything.  He wouldn't eat this cheesecake, he just admired its construction.)

He missed out.  It was as good as it was cute.  Even with a web and a spider.

 
How-To:
For the cheesecake, use the recipe linked above.  
For the chocolate topping, I used a 1/2 cup peanut butter and a bag of semi-sweet chocolate chips, melted in the microwave for one minute.  I spread it on the chilled cheesecake while it was still in the springform pan.
For the almond bark I melted about 3 bricks out of the package and had leftovers.  Melted almond bark went into a squeeze bottle to draw the circles.  Make certain you draw your circles and then drag the lines with the toothpick quickly, because the almond bark firms up fast and if it solidifies you won't get a web, you'll get broken pieces of almond bark.
The spider was a Hershey's Spice Kiss with black licorice.
Chill the cheesecake after you do the chocolate top and web until the chocolate hardens.  Remove the sides of the springform pan, then enjoy!


Sunday, October 13, 2013

Pumpkins and Kisses Blondies


I'm on a mission to use up the bountiful pumpkin harvest we had this fall.  Every time someone comes over I try to fob off a few, because my freezer is full and there's no way we can possibly use all of these little guys up.


In the meantime I'm baking pumpkins left and right.  I pinned this recipe the other day, and used it as my inspiration for these fall-inspired blondies.  I don't really get into all of the recipes that heap candy after cookie after chocolate chip into a single recipe, but I knew with some refining they had promise.

They did.

WOW.

Amazing!  I'll be immodest here and say I made a production of patting myself on the back when we dug into these.  They were genious!

Here's the play-by-play: 

I grabbed up a pumpkin off of my front porch, washed it, cut it in half, scooped out the seeds, roasted the halves until the flesh was soft, scooped out the flesh from the rind and mashed the flesh.  If you don't have a baking pumpkin on your porch, just grab a 15 oz can of pumpkin puree.


While you're scooping and mashing, put butter and the sugars into your KitchenAid and let it whip for a good five minutes so it's light and fluffy.


Add the other wet and dry ingredients for the blondies, and then this happens.


Pumpkin Spice Kisses.  Oh yeah.  Mmmm-hmmmm! Seasonal Kisses.  I'm partial to the mint ones at Christmas time, but these definitely come in a close second.  They get chopped up into big pieces and added to the dough with some chopped pecans.

 
About 2/3 of the dough gets baked for ten minutes in a 9 x 13 cake pan, and then a whole bag of caramels, melted with some evaporated milk, gets poured on top.  That caramel-y goodness is topped with the other 1/3 of the dough.  Like a pumpkin blondie sandwich.  


Definitely my kind of sandwich.  The texture is just like a super good brownie--thick and chewy--with bright cinnamony-sweet kicks from the Kisses and nutty goodness from the pecans.  The pumpkin pie flavor brings it all together.  It's so good.  

And you could always do this to it, too.

  
So stop in at my place and pick up a pumpkin (or five).  Then dash to the store to pick up a package of Pumpkin Spice Kisses (or five).  You won't be sorry you did.  (And neither will I).

Pumpkin and Kisses Blondies
Adapted from Loaded Caramel Pumpkin Blondies

2 cups all-purpose flour
1/2 cup graham cracker crumbs
1/2 tsp baking soda
1/4 tsp salt
2.5 tsp pumpkin pie spice
1 cup softened (not melted) butter
1 cup brown sugar
1/2 cup white sugar
1 egg
1 tsp vanilla
2 cups mashed pumpkin (or a 15 oz can of pumpkin puree)
30 Pumpkin Spice Hershey Kisses, chopped
2 oz pecans, chopped
1 bag (11 oz) caramels
1/3 cup evaporated milk

Prepare the pumpkin if you are using a baking pumpkin.  If you aren't, skip that step.  

Preheat your oven to 350 degrees.  In a mixer, vigorously beat the butter and sugars for about five minutes, until it is light and creamy.  Add the pumpkin, egg, and vanilla, beating until well incorporated.  In a separate bowl whisk together the flour, graham cracker crumbs, baking soda, salt, and pumpkin pie spice.  Add the dry ingredients to the batter and mix until combined.  Add the chopped Pumpkin Spice Kisses and pecans, then gently mix until combined.  

Spray a 9 x 13 baking dish with nonstick cooking spray.  Spread 2/3 of the dough in the bottom of the pan and bake for 10 minutes.  While that is baking, unwrap the caramels into a glass bowl and add the evaporated milk.  Microwave the caramels for a minute, then stir.  Microwave in additional increments of 30 seconds, removing the caramels when they are melted.  Pour the melted caramels over the brownie batter and allow it to sit for about five minutes to firm up a bit.  Then blob (yep blob) the remaining 1/3 of the dough evenly over the top of the caramel.  Spread gently so you don't disrupt the caramel.  Bake for another 30 minutes.  Remove from the oven and allow the blondies to cool.  Then enjoy! 


Saturday, September 28, 2013

Irish Coffee


A few years ago my husband turned 40.  To celebrate, I brought him along to a conference I was attending in San Francisco.  (I know, I know, that doesn't sound very romantic but it was, and hey! Two birds, one stone.)  We had never gone away together on a trip like that without the kids.

Wow!

We love each other.  Of course we love each other, we've been married for 19 years.  But on that trip we remembered we liked each other.  He's pretty darn good company when the kids aren't around!  We drove all over Muir Woods National Monument, gazed out for miles across the Pacific Ocean, drove back and forth over the bridge, and ate at all sorts of amazing places.  While we liked the s'mores pie at the Buckeye Roadhouse and the chocolate at Ghirardelli Square and the seafood at Scoma's, the thing we loved the most was the famous Irish coffee at the Buena Vista Cafe on Fisherman's Warf.  A-mazing.

While neither of us can sneak away to San Francisco right now, and I can't recreate the atmosphere of sharing this coffee on a cold rainy night on the Bay, I can settle for the next best thing (haha) and make Irish coffee on a cool evening in Iowa.

The best coffee at my house comes from my moka pot.  While it isn't an espresso maker, it's pretty darn close and it cost WAY less.  It's also easier to use and clean up.  Just fill the base with water:

   
Insert the metal filter and add espresso grounds


And screw on the top.


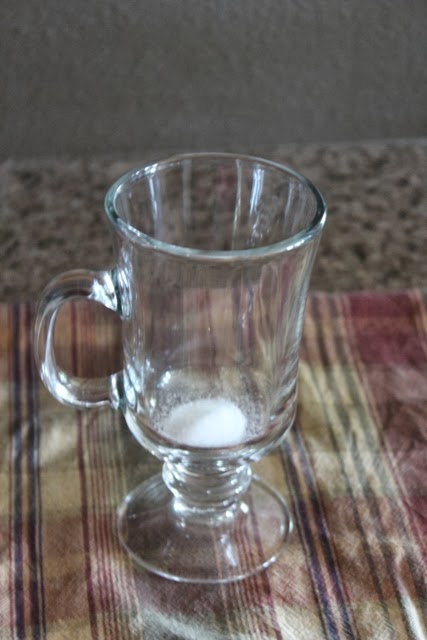
In about eight minutes you've got almost-espresso.  If you don't have a moka pot, just make a strong pot of coffee.  While it's brewing, add a teaspoon of sugar to your coffee mug.


I have two glass coffee mugs like this one.  They're just like the mugs used at the Buena Vista Cafe.  I found them at Crate and Barrel, in case you want some too.  When it's done brewing, pour the hot coffee on top of the sugar, about 3/4 full.


Top the coffee with a jigger of Irish whiskey.  Did you know a jigger is the same thing as a shot?  And for those of us who just want a specific amount, that's 1.5 ounces.  So now you know.  A jigger of whiskey is 1.5 ounces.

I'm sure there are all sorts of Irish whiskeys, but when I make Irish coffee I buy Jameson.  It's ridiculously expensive and I have to stand in the alcohol aisle and debate for five minutes on how much I really want Irish coffee before I decide.  I'm sure I look like an alcoholic fixating while I make up my mind.  I used this blog as the deciding factor for this bottle because I really wanted to share with you.  My husband thanks you.

  
Warm up some heavy whipping cream (about a minute in the microwave) and whip it until it's thick but not at all like whipped topping.  I use this milk frother, which is the best thing since sliced bread.  I use the moka pot and frother every morning when I make my latte.  In case you were wondering.


Here's the only tricky part about making Irish coffee.  You want the whipped heavy cream to float on top of the coffee.  I'm not perfect at this yet, but practice makes perfect, right?  And we don't mind drinking our mistakes around here.  This glass turned out pretty well, though I've got a way to go before I reach Buena Vista standards.

The trick is to pour the hot whipped heavy cream over a spoon so it doesn't pour directly down into the coffee.  


 I should have stopped here, but I poured a little too fast and this happened.


The cream started to mix a little with the coffee.  But it all worked out.  

   
Our Irish coffee was layered and lovey.  Cream.  Creamy whiskey.  Sweetened coffee.


While the ocean wasn't a block away, and our four kids were swarming and chattering and busy, for a moment we could remember that time together in San Francisco.

That time when we remembered we still liked each other.   You know what I mean.

Slainte!


Irish Coffee

Hot strong coffee
1 tsp sugar per mug
1/4 cup heavy whipping cream per mug
1.5 ounces Jameson Irish Whiskey per mug

Prepare coffee.  As the coffee is brewing add a teaspoon of sugar to each mug and heat the heavy cream in a microwave safe container.  Briskly whip the heavy cream until it is thick (but not thick like whipped cream or whipped topping).  Pour the hot coffee into each mug on top of the sugar.  Gently pour a jigger (1.5 oz) of whiskey on top of each coffee.  Very gently pour heavy whipping cream on to a spoon above the coffee so that the heavy cream floats on the top of the whiskey.  Then enjoy!

Monday, September 23, 2013

French Bread

Here's a true story.  Last year my husband took our two oldest boys on a 'mancation' to hike around in Colorado.  The boys called me from the road laughing like lunatics, barely able to contain themselves, talking right over the top of each other to be the first to tell me that their dad had bought them white bread.  As if he had just bought them each a 24-pack of Mountain Dew.  Liter-size.  As if he said "let's skip the Rockies" and let them spend a day at mini golf with bumper cars and an arcade with an unlimited pile of quarters.  As if they had just broken every rule about using a fork and napkin and saying 'excuse me.'  My kids are crazy like that.  Total rebels. 

But it's true, I'm a little freakish about bread.  I never buy white bread.  Ever.

Ev-er. 

Far better than buying the whole-wheat-no-high-fructose-corn-syrup-no-artificial-colors-no-artificial-flavors-no-dye-no-nothing-bad bread is just making my own.  There is something so homey and so nurturing about making it.  And I can't imagine my kids fighting over the last piece of white bread like they fight over the last pieces of a warm loaf fresh from the oven.  They know good stuff when they have it.

It's true, making bread takes time.  It doesn't stay fresh as long.  Something about the total lack of preservatives, I guess.  Just some yeast, some flour, some water, and a little bit of salt and oil.


And of course, time for it to rise.


Roll it out, roll it up, and brush it with a simple egg white wash for color.


And walla.  A gorgeous loaf of French bread--sans WalMart.  Sans crap you can't pronounce.  


It slices like a dream, and it's super good plain, with jam, honey, or slathered in garlic butter.


Here's the end of that same story.  A few days later, on their weary journey home, whey they were tuckered out from fresh air and hiking and processed meat and white bread, they called me from the road and said "Mom, I really miss your cooking."

Take that, Wonder Bread.

French Bread
Slightly adapted from this recipe from Allrecipes 

1 pkg (2.25 tsp) yeast
1 cup very warm water
3 cups bread flour
1.5 tsp salt
1.5 tsp sugar
3 tsp. canola oil
1 T corn meal
1 egg white, slightly beaten

Pour warm water into a glass bowl and sprinkle with sugar and yeast.  Whisk, then allow the yeast to proof for about ten minutes.  In a large mixing bowl, whisk together flour and salt.  When yeast has risen, whisk in the oil and pour into flour.  Beat on low speed until dough has formed.  If you have a food processor, use the dough hook and allow the machine to knead the bread for about 8 minutes.  If you don't have a food processor, roll up your sleeves and go at it for the same amount of time.  Lightly grease (with butter or canola oil) a large glass bowl.  Form the dough into a ball, place the ball into the bowl, and roll once so all sides of the dough are slightly covered.  Cover and allow to rise in a warm dry location until doubled in size, about an hour and a half.  On a lightly floured surface, press or roll dough into a 9 x 12 shape.  Roll the dough so it forms a 12 inch long log.  Slice three slits into the top.  Sprinkle the cornmeal onto a baking sheet and move the dough onto the cornmeal to prevent it from sticking to the pan.  Brush the dough with the egg white mixture.  Spray a length of saran wrap with nonstick cooking spray, and gently drape the saran wrap--sprayed side down--onto the top of the loaf to prevent it from drying out.  Allow the loaf to rise a half hour.  Preheat the oven to 400 degrees.  Bake the bread for 30 - 35 minutes, or until golden brown.  Allow to cool until warm to the touch, then slice and enjoy!