Monday, March 25, 2013

Irish Brown Bread


Last summer Dan and I went to Savannah, Georgia.  Our time there characterized our approach to travel.  I had a list of things I wanted to do and see, and I used Yelp like crazy finding the best spots to eat.  Dan just wanted to go there and see what there was to see.  I've learned to navigate this.  I don't over-schedule anything, and I make sure I avoid really touristy areas.  I don't like them, anyway.  Dan's most happy when we happen upon a great church or cemetery.  Put the man in a national park, and he is in heaven.  I know this about him, and I'm happy to accommodate.  As long as we eat in the good spots.  

Thank Yelp, we had supper at Kevin Barry's Irish Pub.  I know that's weird--to go down south and eat Irish food, but people on Yelp were crazy for it.  For good reason, we found.  Though it wasn't the best place we ate, the Irish brown bread there was life changing for me.  When we got home practically the first thing I did was try out recipes.  I stumbled upon this one, and with some modifications it has become a staple with soup around here.  Truly, the children eat it as if we were going to face the great Irish famine tomorrow.  It's that good.

Aside from how it tastes, Irish brown bread is ridiculously easy to make.  It does not require any rise time, and it contains no yeast.  It can be made quickly with a food processor, and is finished in less than an hour. 
 
Another benefit is that it uses common ingredients.  I've found that either buttermilk or plain nonfat Greek yogurt work just as well, so I use whichever I've got in the fridge.  Though the recipe calls for both all-purpose and whole wheat flour, I've made it with just all-purpose flour when I didn't have whole wheat flour left in the pantry and it still turns out great. 
This bread also does not require extensive knead time.  In fact, just knead it about five times and it's formed and ready to put on a pan.
It doesn't even require a rolling pin.  Just flatten it with your hands until you've got a circle about 7 inches in diameter.
I'm not quite sure why, but the recipe I based my Irish brown bread from instructs the baker to cut an x into the dough before baking it.  There is probably some chemistry or culture behind this, but forgive me, I have no idea what it is.  I'm just a total rule follower, and therefore, I cut an x in my dough.

It seems to work, though.

I've never had this recipe fail.  It isn't supposed to look perfect--in fact, it's supposed to look kind of rustic.  I love that.  It releases my inner perfectionist, and I can just enjoy the final product.  (I do actually measure it with a ruler, though, to make sure it's 7 inches.  I know.  I know.  Type A)
I generally cut it into 10 wedges, but only because that's more opportunity for butter.  Everyone always takes more than 1 piece.  Except me, because I'm terrified of getting diabetes and watch what I eat.  (refer to Type A comments) 
I have to work hard to be restrained with this bread, too.  I could definitely eat half the loaf, with nothing else, for any meal.  Try it, and you might just call it a pot o' gold.  You might have the luck of the Irish.  Or you might just make your family happy.  And that's enough for me.


Irish Brown Bread
Adapted from Irish Brown Bread shared by Sunset Magazine

1 c. all-purpose flour
2 T. sugar
1 t. baking soda
1 t. baking powder
1 t. salt
2 T. cold butter
2 c. whole-wheat flour
1/3 c. old-fashioned rolled oats
1.5 c. buttermilk OR plain Greek yogurt

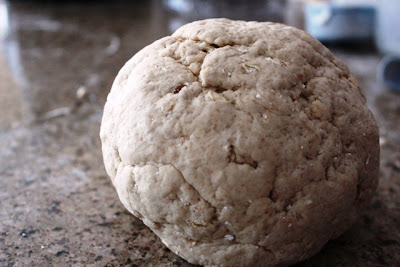
Preheat oven to 375.  In a food processor, pulse all-purpose flour, sugar, baking soda, baking powder, salt and cold butter until butter is well incorporated.  Add the whole-wheat flour, rolled oats and buttermilk.  You could use plain Greek yogurt instead of buttermilk--we've done it both ways and both are great.  Pulse the food processor until a ball of dough forms.

Sprinkle about a teaspoon of flour onto the counter, and knead the dough about five times.  Form the dough into a ball, then flatten the ball into a 7-inch circle.  Cut an x into the top of the dough.  Butter about an 8-inch circle on a baking sheet, place the dough on top, and bake for 35 minutes.  Remove the bread and allow it to cool for at least a few minutes before slicing it into wedges.  Enjoy!


Sunday, March 24, 2013

How to Make Yogurt


My husband calls me a tree hugger when I make yogurt.  He says I'm a 'granola' and an 'earth mother.'  He asks if I'm going to stop shaving my armpits.  Ew.  For the record, I'm not.  Even though I'm not total Nature Lady, I did make the switch from buying yogurt to making it because I started to feel bad about the ridiculous number of little plastic cups I was throwing away every month.  Just so you don't think I'm entirely altruistic, though, I made the switch for budgetary reasons, too.  Yogurt gets expensive, particularly if you like Greek yogurt.  And I do.  One gallon of skim milk results in about eight cups of Greek yogurt, or I could pay around $1.25 per 6 oz. container at the grocery store.  

I can't take any credit for coming up with how to make yogurt.  Annie over at Annie's Eats got me started down this path.  Her blog is awesome, but when I started making yogurt from her recipe I longed for more pictures to show me if what I was coming up with was anything like what she came up with.  After a lot of trial and error, I've come up with my own tricks to get my yogurt to turn out.  I thought I'd pass them along.  Or you could follow Annie's directions, because she's fab.

First, let me warn you that this isn't a fast process.  Allow at least 15 hours from start to finish.  I always start mine on a Friday or Saturday evening, because it needs to sit in the oven for 12 hours, and then it needs to be strained and beaten after that.  I don't have time to do that on a morning when I'm also getting four kids ready for school, and me ready for work by 7:40 am.  So here goes. 

I like to let my gallon of skim milk sit out on the counter for a while to bring it closer to room temperature.  Then I pour it into a pot.  Go with the heaviest pot you have.  For the record, this isn't my heaviest pot, but I was using that to make soup so I had to go with this one.  
On medium-low heat, bring the milk slowly up to 180 degrees.  This part may result in crud forming on the bottom of your pot.  I haven't figured out how to prevent this.  I'm convinced I need a LeCreuset pot, but I can't quite bite the bullet and splurge on one yet.  Maybe this year.  In any case, the best I've got for you is to whisk the milk quite often, and don't try to heat it up too quickly.

UPDATE:  This process goes way faster, and results in absolutely no crud, if you heat your milk in a glass container in the microwave.  In my four-cup glass measuring cup I can bring milk to 180 in 6.5 to 7 minutes.  That means a half gallon takes me less than 15 minutes to heat with far less mess than heating the milk in a pot.  However, I'm aware that some of my friends have a strong aversion to the microwave.  Both ways work, so go with whatever makes you happy.
Generally I would recommend using a candy thermometer, but my husband recently put ours in the dishwasher.  I used a digital meat thermometer because it was what I had.  Use whatever works for you.  Once the milk reaches 180 degrees, remove it from the heat and let it cool back down to between 110 and 118 degrees.  There are some chemistry reasons for this, but I'm not going to go into them.  Just trust me.  The 110-118 is super important, because if it's hotter you'll kill the good bacteria in your yogurt starter, and if it's cooler they won't multiply.
The cooling down takes a lot longer than you think.  I've tried all sorts of things to speed up the cool down, but I've learned to just put it aside and leave the kitchen to do something else for a while so I'm not too antsy.  When it has cooled down, I always pour the milk into a covered ceramic container.  I have tried to just keep it in the pot, but that doesn't work for me.  Not sure why--maybe something with the metal?  I've started using the dish part of my crockpot (it removes from the heater base) and it works better than anything else I've tried.

Now you need some yogurt purchased from the store.  That's going to get the good bacteria in there.  I use about a half cup, but I have to fess up about not being particularly exact.
Warm up your oven just a little bit--not so it's hot, just so it's a little warm.  Annie recommends turning it on for a minute, then turning it off.  I had baked Irish brown bread before I started making yogurt, so my oven was already warm.  This is going to seem weird, but wrap the container in a towel to help the container stay warm and, this is really important, turn on the oven light.  Then close the oven door and let it sit in there for 12 hours.  Annie says 8 to 12, but if I don't leave mine in there for a full 12 hours it doesn't come out well.
  
It's going to look kind of gross when it comes out.
You should notice that it's still quite warm.  I tested mine with my handy dandy meat thermometer, and it was still 118 degrees a full 12 hours later.

You could strain it now, but I've found my yogurt firms up WAY better if I wait until it's cold before I strain.  Since it's winter here in Iowa, I just set my container outside for an hour or two.

UPDATE:  If you have farm cats, they may eventually catch onto the fact that there is a dairy product under the lid and destroy your hard work.  In which case, putting this into the fridge instead of on the porch is a good idea.  Just sayin.
Now you're going to need some high tech tools to strain it.  Or not.  I like to use two steamer inserts to an aluminum pot I have, and cheesecloth.  Unfortunately I was out of cheesecloth this morning so I used paper towels instead.  Cheesecloth works better, but paper towels work in a pinch.  
 
Since the purpose of straining is to get rid of excess whey, I put the whole thing in my sink so it can just drain.  You can use whatever system you want.
Until I started using the crockpot, waiting 12 hours, and cooling before straining, I always had a LOT of whey and some yogurt.  Now it's the opposite.  I drain what I can of the whey first, and then I use a big spoon that has holes in it to scoop out the yogurt and put it onto the paper towels.
 
Let the yogurt strain until it is as thick as you would like.  This is the part that changes it from just yogurt to Greek yogurt.  I've waited a half hour, and I've waited hours.  I have found if I let it strain for too long it gets too thick--almost the consistency of a soft cheese--so I go with about an hour.  When I use cheesecloth I like to use a spoon half-way through the straining time to scrape the yogurt off the bottom and move it to the top because that seems to get rid of the whey from the top better.  That part doesn't work as well with paper towels.  When it's done straining you could put it into containers, but I don't like the texture of it--it's not smooth.  It's also not sweetened at all.  
You can flavor your yogurt however you would like, or leave it plain, but I like to use between 6 and 8 teaspoons of Stevia and about a tablespoon of pure vanilla.  I put it into a blender, and it morphs into the smooth, creamy consistency of the Greek yogurt you can buy in the store.  

Here's the save-the-Earth part.  Pour the yogurt into glass dishes.  Mine are Pyrex containers I picked up at a local WalMart.  
You can dress up your yogurt however you'd like.  I love to put about a quarter cup of frozen cherries in a container of yogurt in the morning, then take it to work and put it in my mini fridge.  By 2 pm the cherries are thawed and release their juice into the yogurt when I stir it around.  Frozen blueberries do the same.  I've also been known to put about a tablespoon of my homemade strawberry-rhubarb jam or peach jam into the container to swirl it around.
Total heaven.  See the green grass in that picture?  I took it late last summer when I made those jams.  I miss summer.  Sigh.  But the jam still tastes like summer, which makes my yogurt extra scrumptious.  
I'm not Nature Lady, and I do shave my armpits, but with this yogurt easily accessible in my fridge, I no longer contribute hundreds of plastic containers to landfills and I save money.  And I get to make food where I know exactly everything inside of it.  I have to feel good about that.  Try it.  It's FUN!


Friday, March 22, 2013

Peanut Butter Cup Pie


March is birthday month in my family.  My sister Christy, then Elijah, then my sister-in-law Candice, then my husband Dan, then my niece Cheyanne, and then my niece Zahria.  If one does the math, it seems my family is particularly loving in June.  Which makes sense, because we're a family of educators.  School is out in June.  We finally relax and have time to enjoy each other.  I guess we enjoy each other a lot.

Goodness, that was probably inappropriate.  But see, I made this peanut butter cup pie for my love, who turned 42 today.  There was a lot of selfless taste testing that went into this one, because I needed to make sure it was just right.  And not poisoned.  Or something.


It's a fact that I get much more excited about my love's birthday than he does.  I forced him to look through my entire cake board on Pinterest.  Eh.  He could take them or leave them.  I then forced him to look through my entire cookies & bars board.  Yawn.  Then I remembered bars I had once made with a recipe from Michelle, the Brown-Eyed Baker.  Bingo.  With some modifications to change the bars to a pie, and to put the pie over-the-top, we're celebrating with a nontraditional cake.  Seriously, what could be better than chocolate and peanut butter?
 
 
The base of this pie has a really weird ingredient, but it totally replicates the slight grittiness of the inside of a peanut butter cup.  Graham cracker crumbs.  Weird, huh?


In the inspiration recipe this base is topped with melted chocolate, but I had to do some fancy-ing up to that.  Instead I went with a ganache, but used semi-sweet chocolate chips instead of bittersweet chocolate.  My kids turn up their noses at bittersweet chocolate.  We have unrefined taste around here, I guess.

 
Be certain to test out the chocolate chips.  The package might say 'semi-sweet' but what if that was a misprint?  Taste some just to be certain. Then add a cup of hot hot heavy cream and let it sit about five minutes.


 I love this part...


Mmmmmm.  Ganache.  Better try it, though, to be sure.  I spread a little bit of this over the top of the peanut butter base and popped it into the freezer for a few minutes while I chopped up the peanut butter cups.


I'd advise that you test out a few of the chopped pieces, just to make sure the bag of candy was fresh and everything.  It's all about quality ingredients, and all that.


And then, more ganache.  How could this be anything but good?


Let it sit in the refrigerator for a while, until the ganache layers harden.  While you wait, prewash all of your dishes with your tongue before loading up your dishwasher.  Really, that's easier on your dishwasher.  And then......
 
Oh yeah.  That's what I'm talking about.  


 So good, it kind of felt like a birthday present to everyone.  Happy birthday to my love.  He was worth every moment I 'slaved' over this one. 

Peanut Butter Cup Pie
Modified from Peanut Butter Cup Bars by the Brown-Eyed Baker

1 c. butter
2.5 c powdered sugar
2 c. peanut butter
1.5 c graham cracker crumbs
12 oz semi-sweet chocolate chips
1 c. heavy cream
1 bag Reese's Peanut Butter Cup minis

Melt the butter, then beat with the powdered sugar, peanut butter and graham cracker crumbs.  Spray a large pie pan with nonstick cooking spray, then spread the peanut butter base in the pie pan.  

Pour the chocolate chips into a heat-resistant bowl.  Heat the heavy cream in a saucepan until it begins to boil.  Pour the heavy cream on top of the chocolate chips and allow it to rest for five minutes.  Then whisk the mixture until the ganache is smooth.

Pour just enough ganache onto the peanut butter base to spread thinly.  Refrigerate for 20 minutes or so.  While that cools, chop the peanut butter cups.  Spread the chopped peanut butter cups over the peanut butter base, then pour the remaining ganache on top.  Refrigerate for an hour or more.

Enjoy!


Monday, March 4, 2013

I Am Not Perfect (at cake pops)


Around this part of the country, the common response to "I'm not perfect" is "Only Jesus is perfect."  Since I'll never be anything close to Jesus, I know I should try to let go of the blame and self-recrimination I feel every time I try to use candy melts.  And fail.  

But I can't let it go.  

All these cake pop people on Pinterest, and the queen of cake pops, Bakerella herself, make it look so simple.  In fact, my inspiration for these cake pops came from a blog post that called them--and I quote--'easy to make.'  So easy her toddler helped her.

The cake pop that my child is pretending to eat?  It's supposed to be a Lego head.  Yeah.  I know.  It's bad.  It was all going great until I hit the candy melt stage, and then nose dive.  I'm terrified to melt it too long or it will seize up.  Been there, thrown that away.  There is some sweet spot between not hot enough (thick substance) and too hot (solid ruined substance) where the candy melts are supposed to be thin and runny.  You're supposed to be able to just dip the dang cake into the chocolate, gently tap off the excess, and have a glossy beautiful pop.  But no.  No.

So here is how I made not perfect Lego cake pops.

I bought a cake mix and frosting.  (GAH!)  Serious, they are going to be demolished by 8 year olds who won't care, and I just didn't have time to do scratch for a cake that was going to get crumbled up and mixed with frosting.  So there.  Anyway, I baked the cake, I crumbled it into pieces, I mixed it with the can of frosting.


That part went great.  I formed them into balls, and then rolled the balls into cylinders.


Check, check.  Still going great.  It hit me at this point that they looked like marshmallows, and that next time I should just try using marshmallows for this instead.  But anyway, still going fine.  I needed some type of candy on the top to make the little bump that would connect with the Lego hair or the Lego hat.  I used Bottlecaps, adhered with some glaze.


All going great, I popped them into the refrigerator for a half hour, then pulled them out.  I melted just a small amount of candy melts, twirled each stick in melted 'chocolate' and inserted the sticks carefully into the bottoms of the cake pops.


Still going great.  I put them in the freezer.  And then I melted the candy melts and mixed them with yellow glaze food coloring.


And then the horrors started.  I dipped one pop in.  I couldn't even twist it.  I worried the cake pop would come off the sucker stick if I attempted to tap it on the side to get rid of some of the stuff.  I got out a butter knife.  I should have just given up at this point.  To make it all work, I had to essentially frost every stupid cake pop with the candy melts, heating the stuff periodically when it got too hard.  Unfortunately it was next to impossible to make that little top piece look like what it was supposed to look like, and I couldn't get an even surface.


By this time I'd invested a good stretch of time on these.  I was getting really mad.  I took out the black icing, just like the blog post I read suggested, and the toothpick recommended, and I attempted to draw Lego faces.  

That's when I found my way out of this disaster.  These cake pops were supposed to be birthday treats for Eli on Thursday--he's turning eight, and he's the resident Lego maniac.  Eli begged to get to draw the faces.  If I can say Eli helped with these cake pops, then I don't have to be so embarrassed if he takes them to school and adults actually see them.


That's probably mean, right?  But this is the deal.  Here are two of Eli's creations:


He's so proud of them.  He's so excited about them.  He can't wait to take them to his friends.  He humbles me.  Only Jesus is perfect.  But my kids come dang close.